
-
Why 'What's the best measurement tool?' is the wrong question
- Scenario 1: You need micron-level dimensional measurement on machined parts → Renishaw CMM probe
-
Scenario 2: You need continuous position, level, or relative distance feedback → laser level sensor
- Scenario 3: You're chasing electrical or thermal faults → thermal camera rental + Fluke multimeter
-
How to tell which scenario you're in
-
A final thought on the changing quality toolbox
Before I dive in, here's what I do: I'm the quality compliance manager at a mid-size precision manufacturing plant. I review about 200 unique production lots a year, and I've rejected roughly 12% of first deliveries in 2024 for spec mismatches that trace back to the wrong measurement tool. This article is the decision tree I wish we'd had when I started.
My experience is based on mid-size precision manufacturing—more aerospace and medical brackets than high-volume consumer parts. If you're doing semiconductor wafer alignment or building-scale leveling, your tradeoffs will be different. But the way to think about it is the same.
Short version: There is no universal inspection tool. There are only tools that fit a specific scenario. The trick is knowing which one you're actually in.
Why 'What's the best measurement tool?' is the wrong question
When I first started managing quality, I assumed one good system—maybe a CMM with a Renishaw probe—could cover 90% of our inspection needs. That assumption cost us a $22,000 redo and a two-week launch delay. The part looked fine, but it failed assembly because I'd used a CMM on a task that needed a continuous level sensor. Different jobs have different physics: contact measurement, optical distance, thermal signature, and electrical continuity don't map to the same instrument.
Here's the decision tree I now use. It isn't perfect, but it will get you closer than buying the newest top-of-the-line probe and forcing everything through it.
Scenario 1: You need micron-level dimensional measurement on machined parts → Renishaw CMM probe
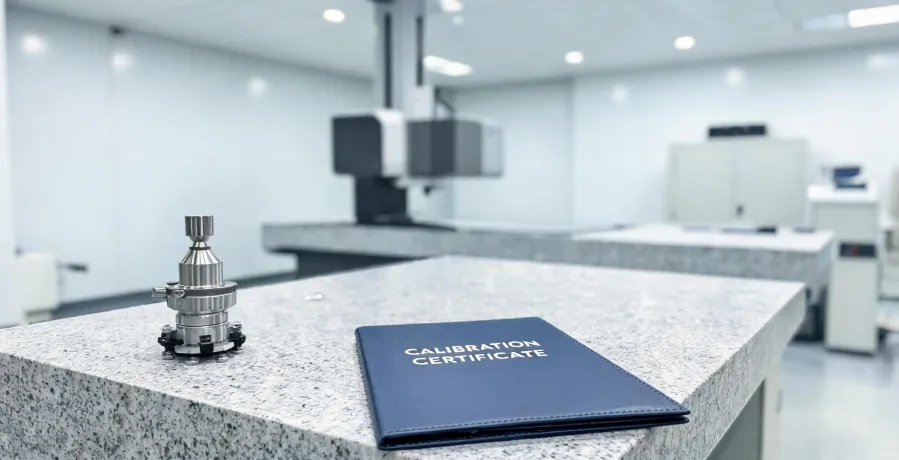
If you're checking bore diameters, true position, surface profiles, or prismatic features on machined parts, a coordinate measuring machine fitted with a Renishaw CMM probe is probably the right call. The word 'Renishaw' gets used loosely; the actual probe head plus stylus setup varies a lot. But for most medium-tolerance geometry work, a touch-trigger or scanning probe gives you repeatability you can't get with calipers.
What most people ignore: probe tips are a selection, not an afterthought
Renishaw CMM probe tips are the actual contact point with the part, so they're as important as the probe body. A dirty or scratched stylus ball can add tenths of a millimeter of error without any obvious warning. If you're probing aluminum, a ruby ball can cause a sticking effect; silicon nitride is often better. For hard metals like cast iron, a diamond stylus is worth the markup. The Renishaw catalog (renishaw.com, accessed January 2025) lists a wide range of ball diameters and stem lengths for a reason—the right tip length minimizes bending and keeps the effective scanning angle stable.
Per ISO 10360-2, you should verify a CMM's performance on a regular schedule. And seriously, inspect your stylus before every lengthy run. In our Q1 2024 quality audit, we found our operators were changing stylus configurations based on habit, not geometry. That single process error caused 14 out of 80 first-article measurements to drift outside tolerance. We now force every new inspection program to specify the exact stylus number before it can be signed off.
Hard numbers help here. A touch-trigger probe like the Renishaw TP20 with a 2 mm ruby stylus can give around ±1 µm repeatability in controlled conditions. The same setup with a slightly bent stylus gave us ±4 µm on a bad day. For a tight bore, a damaged stylus is a deal-breaker. So when someone says 'we need a better CMM,' sometimes the actual fix is a better stylus handling procedure.
Scenario 2: You need continuous position, level, or relative distance feedback → laser level sensor
If your problem is 'is this machine bed still level?' or 'how much is this rail sagging during a cycle?' you don't need a CMM. You need a laser level sensor or a laser displacement sensor, depending on your application. These sensors give you live readings over time and can feed into alarms or PLCs. They're not meant to replace a CMM for complex geometry. I used to think they were overhyped—then one caught a foundation shift that would have cost us a rotor assembly line.
One caveat: there are different types of laser level sensors, and their specs vary wildly. Check the measurement range, resolution, and whether the device outputs an analog signal or industrial Ethernet. Also check thermal stability. A laser level sensor mounted near a heat source will drift. The mount matters way more than people assume.
This is where I honestly don't have hard data on industry-wide reliability—my experience is based on about 15 retrofit projects over four years. But in those projects, the main failures were almost always mounting and wiring, not the sensing element itself.
Bottom line: if you need to watch a single axis over time, a laser level sensor will beat a CMM every time. And to be clear, a laser level sensor is not the same thing as a Renishaw XL-80 laser interferometer. The XL-80 is a calibration standard for machine tools, not a continuous level sensor. If someone says 'we'll just buy a laser level sensor' when they need machine calibration, that's a red flag.
Scenario 3: You're chasing electrical or thermal faults → thermal camera rental + Fluke multimeter
This is a different world, and the one where I see the most expensive missteps. If you're troubleshooting a control cabinet, a motor drive, or a power connection, the fastest tool is often a thermal camera rental rather than a deep dive with a multimeter. A thermal camera shows you the hot spot before you know which terminal to probe. Counterintuitive, I know. But temperature is a broad scan; voltage is a point check.
Most buyers focus on the purchase price of a multimeter and completely miss the cost of an unplanned shutdown. If a cabinet has an intermittent loose connection, you can spend an hour probing with a meter and find nothing in the morning—then lose production in the afternoon. A thermal camera rental, even for one day, often pays for itself and saves a ton of time. When we first rented one, we found an overheating breaker that static resistance readings had missed. The breaker was okay on resistance but had a high-resistance joint under load.
How to use a Fluke multimeter (short version)
Once the thermal camera has pointed you to a specific component, a Fluke multimeter is the tool to confirm voltage, current, or continuity. How to use a Fluke multimeter, short version: plug the black lead into COM, put the red lead into VΩ for voltage/resistance, switch to the correct function, and start with the highest range if your meter isn't auto-ranging. For current, move the red lead to the A/mA jack and put the meter in series with the load—never across a power source. Fluke's online guides (fluke.com, accessed January 2025) are actually pretty clear. The phrase I use is 'when in doubt, power down and measure resistance with the circuit off.'
And don't buy a thermal camera just for one or two jobs. For a 2024 QA project, renting a thermal camera for three days was about 10% of the purchase price. If you only do electrical troubleshooting a few times a year, that's a no-brainer.
How to tell which scenario you're in
Grab your last three quality issues and ask these questions:
- Are the failures about a dimension relative to a datum on a machined part? → Renishaw CMM probe scenario.
- Are the failures about a structure moving or settling over time? → laser level sensor scenario.
- Are the failures involving heat, electricity, or intermittent signals? → thermal camera rental + Fluke multimeter scenario.
This sounds obvious, but in our own plant, we once skipped the diagnosis and jumped to a tool purchase because a tech rep made a good pitch. The diagnostics step is where skilled quality people earn their keep. If you're in a mixed environment—say, a prototyping lab with machined part inspection and a test bench with power electronics—you probably need tools from multiple scenarios. That's normal.
A final thought on the changing quality toolbox
The industry has evolved. Five years ago, a CMM plus a handheld DMM was a complete inspection toolkit in many small shops. Now, customers want traceability, data logging, and remote monitoring. What was best practice in 2020 may not apply in 2025. The fundamentals—measure twice, cut once, know your uncertainty—haven't changed. But the execution has transformed. Getting comfortable with a decision tree like this is part of that new reality.
One more thing: trend data beats snapshot data. A CMM gives you a single point in time. A laser level sensor gives you a trend over time. A thermal camera gives you a thermal trend under load. That's why these tools complement each other instead of competing.
I'm not a vendor, and I don't sell measurement equipment. I'm just sharing the process that finally kept us from buying the wrong tool. It might not fit every factory, but it's a starting point for the next time someone asks, 'Should we get a Renishaw probe or a thermal camera rental?' The answer is: first figure out what you're actually trying to verify.